Wire dispatch
A Comprehensive Beginner's Guide to Drawing a Realistic Sunflower
Welcome to this step-by-step creative journey! Drawing is a skill accessible to anyone with a bit of patience and practice. As you begin, I highly suggest using a pencil; this allows you to sketch freely and correct mistakes with an eraser without any lingering stress. Remember, every great artist started with simple lines and a few smudge marks.
Amelia Quinn Parker
Wire note
Signal tip
The full dispatch write-up continues below on the discovery terminal.
Channel
Discovery Wire
Welcome to this step-by-step creative journey! Drawing is a skill accessible to anyone with a bit of patience and practice. As you begin, I highly suggest using a pencil; this allows you to sketch freely and correct mistakes with an eraser without any lingering stress. Remember, every great artist started with simple lines and a few smudge marks.
Phase 1: Establishing the Structural Foundation
The secret to a well-proportioned flower lies in its initial "skeleton." Start by lightly sketching a large circle on the upper portion of your paper. This serves as a boundary for the petals, so ensure you leave enough room at the bottom for the stem. Within this large shape, draw a second circle about half its size to define the central area. The size of this inner ring determines the length of your petals—a smaller inner circle means longer petals, while a larger one results in shorter ones.
To give the sunflower a natural, three-dimensional perspective, draw a third, slightly smaller circle inside the second one, but shift it a bit toward the left. This subtle offset suggests the flower is tilted, showing more of the right side of the core. Make sure these foundational rings are light, as you will eventually erase them once the drawing is complete.
Phase 2: Sketching the Primary Petal Layer
With your guidelines in place, begin drawing the petals. Think of them like rays extending from a sun. Start by drawing a curved line from the middle circle to the outer boundary. Sunflowers are known for their distinct, pointed tips, so avoid making them too rounded. Add a second line below the first, meeting at a sharp point on the outer circle.
As you add more petals, introduce overlapping to create depth. For example, start the base of a new petal slightly above or behind the previous one. Do not worry about perfect symmetry; uneven spacing and slight variations in size will make your sunflower look more organic and lifelike. Continue this process around the core until the first layer feels complete.
Phase 3: Adding Depth and Secondary Layers
To make the flower appear full and lush, you must add a second layer of petals beneath the first. In the gaps between your initial petals, draw small triangular tips pointing outward. These represent the petals tucked further back. Ensure these additional points still stay within your original outer circle guideline.
As you fill in these spaces, vary the shapes slightly. On the right side, where there may be larger gaps due to our tilted perspective, draw slightly longer edges for these background petals. By the time you finish filling the small remaining voids with tiny triangles, the sunflower should look beautifully dense and vibrant.
Phase 4: Final Details, Stem, and Shading
To ground your flower, add a stem by drawing two vertical lines extending downward. Because our flower is facing slightly left, the stem should connect just a bit to the right of the center. Add a leaf to the stem to enhance the natural feel; a small leaf with slightly jagged or "toothed" edges often looks most realistic.
The final touch involves adding light and shadow to create form. Add short, delicate lines at the base of each petal where they meet the center to simulate texture. Darken the areas where petals overlap to emphasize the layering. For the central core, apply soft shading, perhaps making it darker toward the edges to suggest the dense clusters of seeds found in real sunflowers. Finally, add a bit of shadow to the top of the stem where it disappears behind the petals.
Once you have finished, take a moment to appreciate your work! Learning to draw is a process of observation and repetition. With every flower you sketch, you are training your eye to see the world in a more detailed and artistic way.
More on the wire
LOG · en

How to create a cosy book nook at home
“If your home has room for a reading nook, take advantage of it. If there isn’t an obvious place for one, make the opportunity yourself,” suggests Soho Home Lead Designer Jessica Sims-Wilson, who works with the Soho Home Design service.
LOG · en

Ultimate Supercar Buying Guide
Purchasing supercars on the used or secondary market can be complicated and risky. There are many factors to evaluate and just as many pitfalls to avoid. While the checklist could be extensive, a few key principles stand out when considering a high-end performance car.
LOG · en

The best portable bluetooth speakers for every adventure
Portable Bluetooth speakers make it easy to bring your favorite music wherever life takes you. Whether you're relaxing by the pool, spending a day at the beach, camping under the stars, hiking through nature, or getting ready for a night out, a quality speaker can instantly enhance the experience.
LOG · en
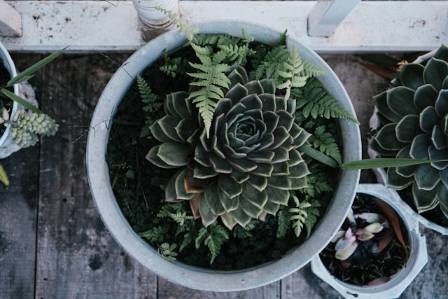
Strategies for Selecting the Ideal Indoor Greenery for Your Home
The popularity of indoor gardening has skyrocketed in recent years, evolving from a simple hobby into a significant lifestyle movement. Research indicates that approximately 87% of American households now incorporate live plants into their interior decor. This widespread adoption of "bringing the outdoors in" is driven by more than just aesthetics; it reflects a growing desire to reconnect with nature within our own living spaces. Understanding how to select the right species is essential for anyone looking to establish a thriving indoor sanctuary in Florida.
LOG · en
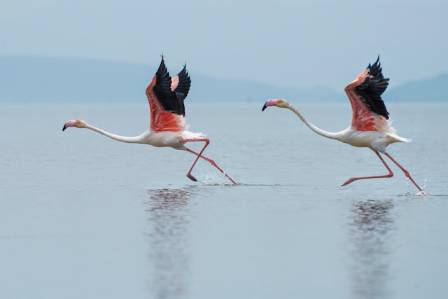
Flamingo Conservation & Research: Status, Protection, and Captive Breeding
Flamingos, with their striking plumage and iconic stature, have long been a focus of conservation efforts due to their unique ecological roles and varying population threats. From once being declared extinct to thriving in captive settings, their conservation journey involves international agreements, regional regulations, and collaborative work by zoological institutions. This article outlines the protection status, regulatory frameworks, and successful captive breeding initiatives that safeguard flamingo species worldwide.
LOG · en

Hardware vs. Software: Why Physical Stabilization Remains Essential
We are currently in a period where camera technology has reached unprecedented levels of intelligence. Features like Electronic Image Stabilization (EIS), Optical Image Stabilization (OIS), and AI-enhanced smoothing are now standard in most devices, allowing anyone to capture clear footage for social media or personal memories. However, software-based stabilization is inherently reactive. It functions by identifying a shake or tilt after it occurs and attempting to fix it through digital cropping, edge warping, or data re-mapping. For filmmakers aiming for cinematic, intentional movement rather than just "usable" shots, these digital patches often result in a loss of image quality and unnatural visual artifacts.